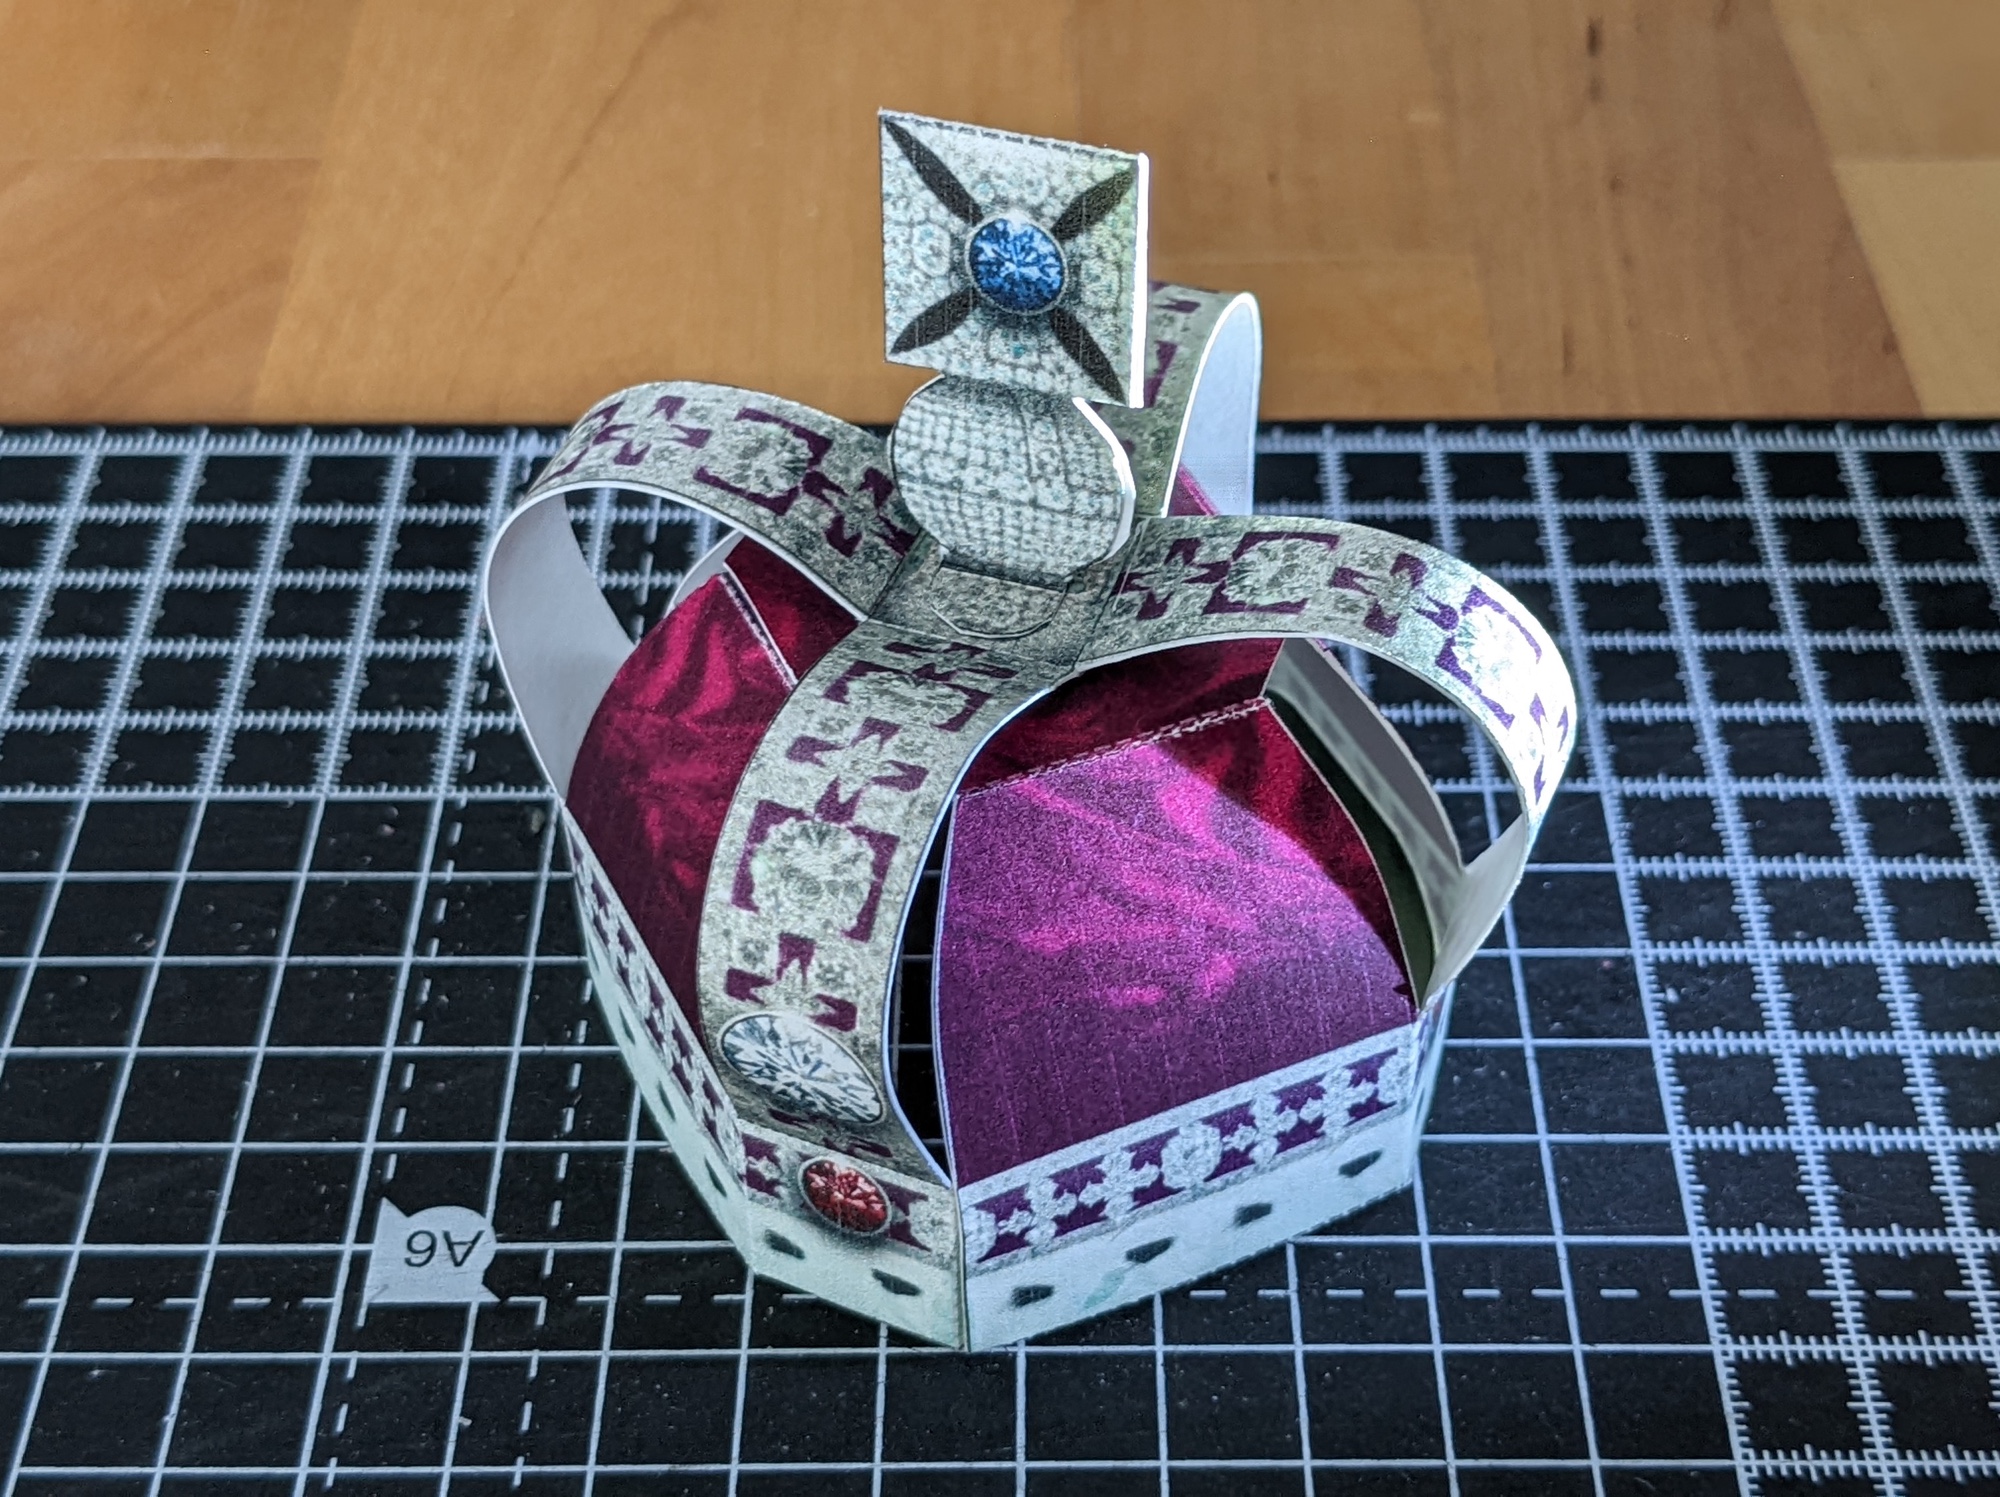
To celebrate Queen Elizabeths Platinum Jubilee I designed a little papercraft version of her crown.
In fact, I’ve recently gotten into making papercraft toys, both building, and designing them. Most of the designs I have built are from FoldUpToys – a paper toy designer I’ve been following for a while.
The actual building of them is quite therapeutic. You have to cut out the shapes, then score the fold lines, then pre-fold, before finally gluing the thing together.
. You can see some of the FoldUpToys models behind the little fellow.](/wp-content/uploads/2022/06/paper-toy.jpg)
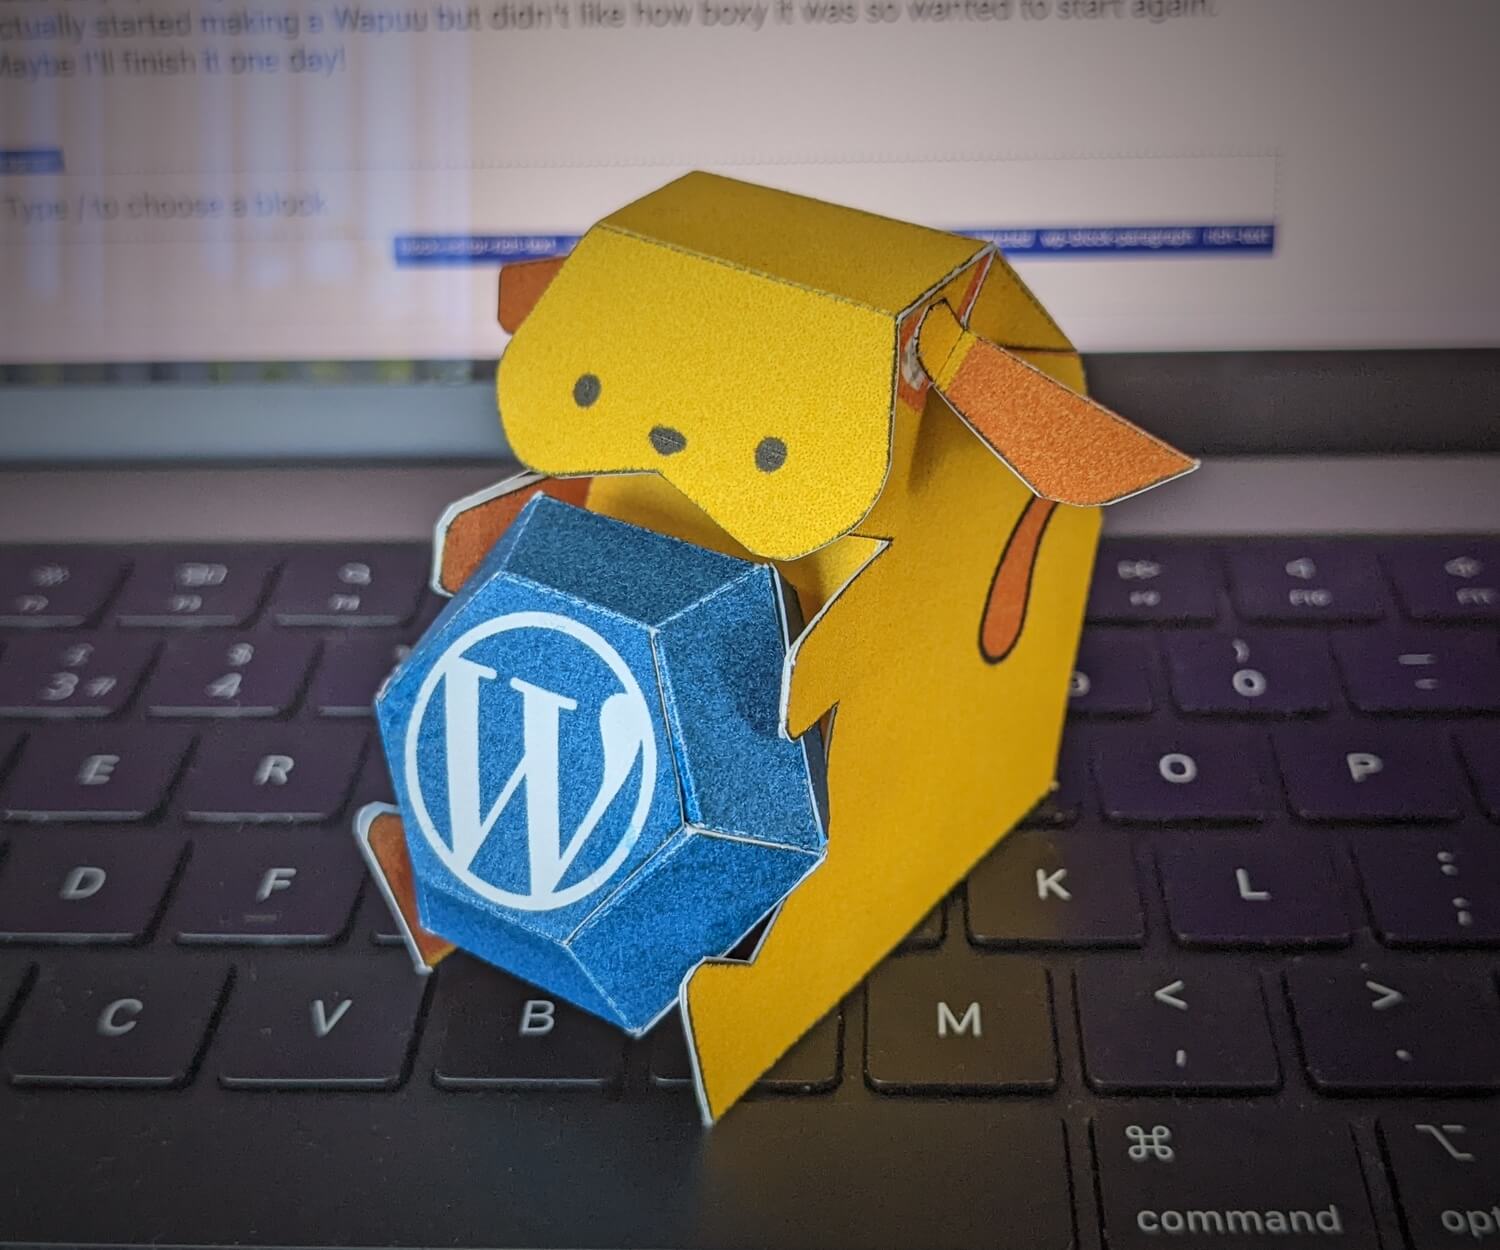
The Brush Ninja toy. You can see some of the FoldUpToys models behind the little fellow.
I’ve been thinking about making my own designs for a while, I wanted to make something for Brush Ninja, and from the first time I made someone elses model I’ve been considering how I would design and create the models and I’ve slowly come up with a method that seems to work well.
So far I have designed 2 models so I suspect things will change but currently my process is:
- Design the mesh in Blender (I started learning Blender in the new year – I want to do more 3d stuff)
- Use Unfolder to unfold the Blender mesh. From here I can work out how the mesh will fold and what I want to change or tweak.
- Tweak the Blender mesh and then unfold again. This time I print and build the paper toy so I can see what I want to change.
- Back to Blender, I can now adjust the model again based upon what I saw when I folded it.
- Repeat steps 3 and 4 until I’m happy with the model. Once happy I export the model as an SVG and then import into Sketch to add colours, tweak the paths (round corners on some shapes), and add instructions. I use Sketch because, as a web designer, that’s what I am most comfortable with but you can use any vector app.
Adjusting the model
For step 4 there’s a few things I do to make the model ready. My initial build is done without thinking about how the paper will be cut and glued, but as I get further along I change the digital 3d model so that it more closely resembles the paper models structure.
Unfolder is great. It lets you rearrange the model splitting on and joining on folds, and adding/ removing/ tweaking the tabs for gluing. Sometimes I want to double up on faces. I might do this to have double sided printing, or for the strength of the model. For example in the Brush Ninja model I made the legs use 2 lots of polygons so that they would be stronger, and so that I could colour both sides. On the crown I added tabs around the bottom to strengthen the brim a bit, and the cross on the top is double sided – these were all made as additional polygons so that Unfolder would see them.
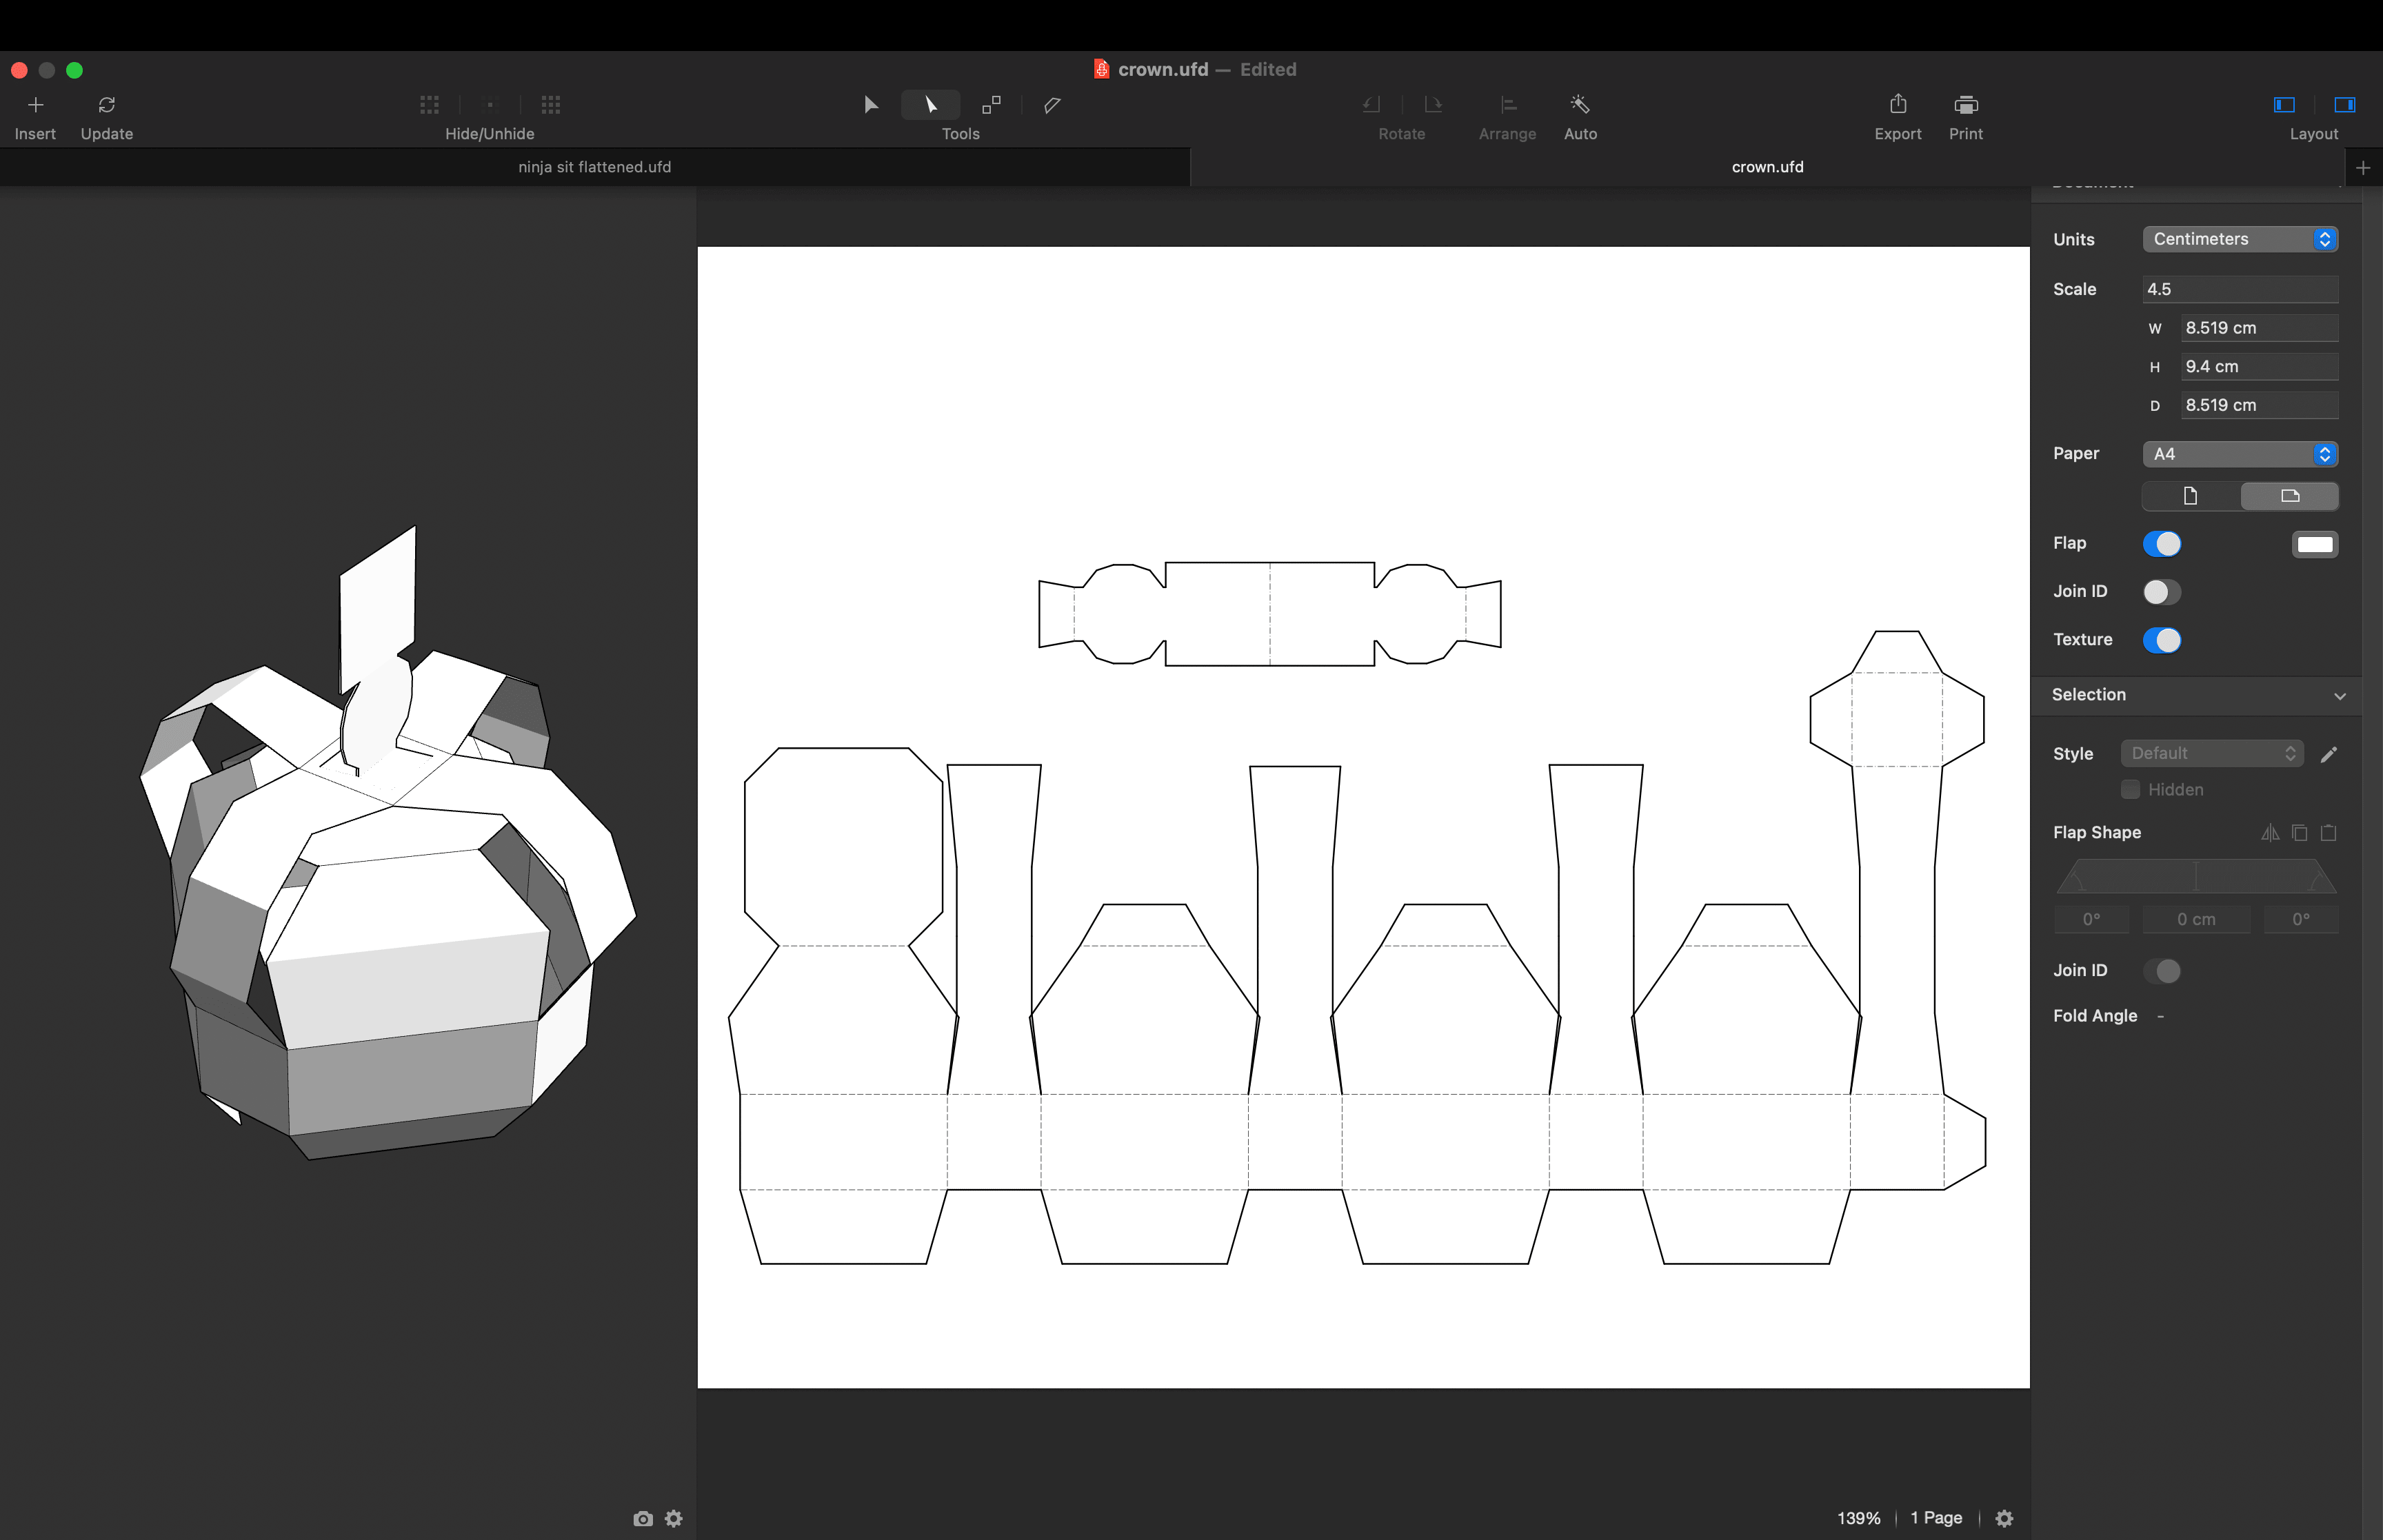
The Unfolder interface as I arrange the flattened 3d model.
I suspect as I do this more I will start adding some of these things in the vector editor, but being able to edit them in 3d makes it a lot easier to visualise. Especially since I’ve not done this sort of thing before.
Texturing
Texturing is all about adding the colours and patterns to the outside of the model.
Unfolder supports importing and exporting textures from Blender but I haven’t done much of that so at the moment I am drawing the textures and adding them in Sketch. This can take a bit of tweaking to make sure things line up. If I continue making these then I will see if I can work out how to export textures so that I can make more detailed things.
Brush Ninja was mostly solid colours, which made it quite easy to put together. The crown uses quite a detailed texture that’s based upon photos of the real Crown Jewels. I made the images in Acorn and then combined the images in Sketch.
In the future I would like to texture objects properly, maybe even paint the texture in Blender, but I need to get a bit more confident with Blender before I attempt that.
Tips
When I am building the model I try to keep a few things in mind.
- Design the models with silhoettes in mind. This is a technique used in games and cartoons to ensure things are recognisable.
- Minimise the number of sides, these are the things that need to be cut out, and folded.
- Keep the sides totally flat. This makes the paper build process much easier. With the crown the curved sections were made with a few polygons (see image) and then I removed the edges in Unfolder to allow the shapes to be curved around.
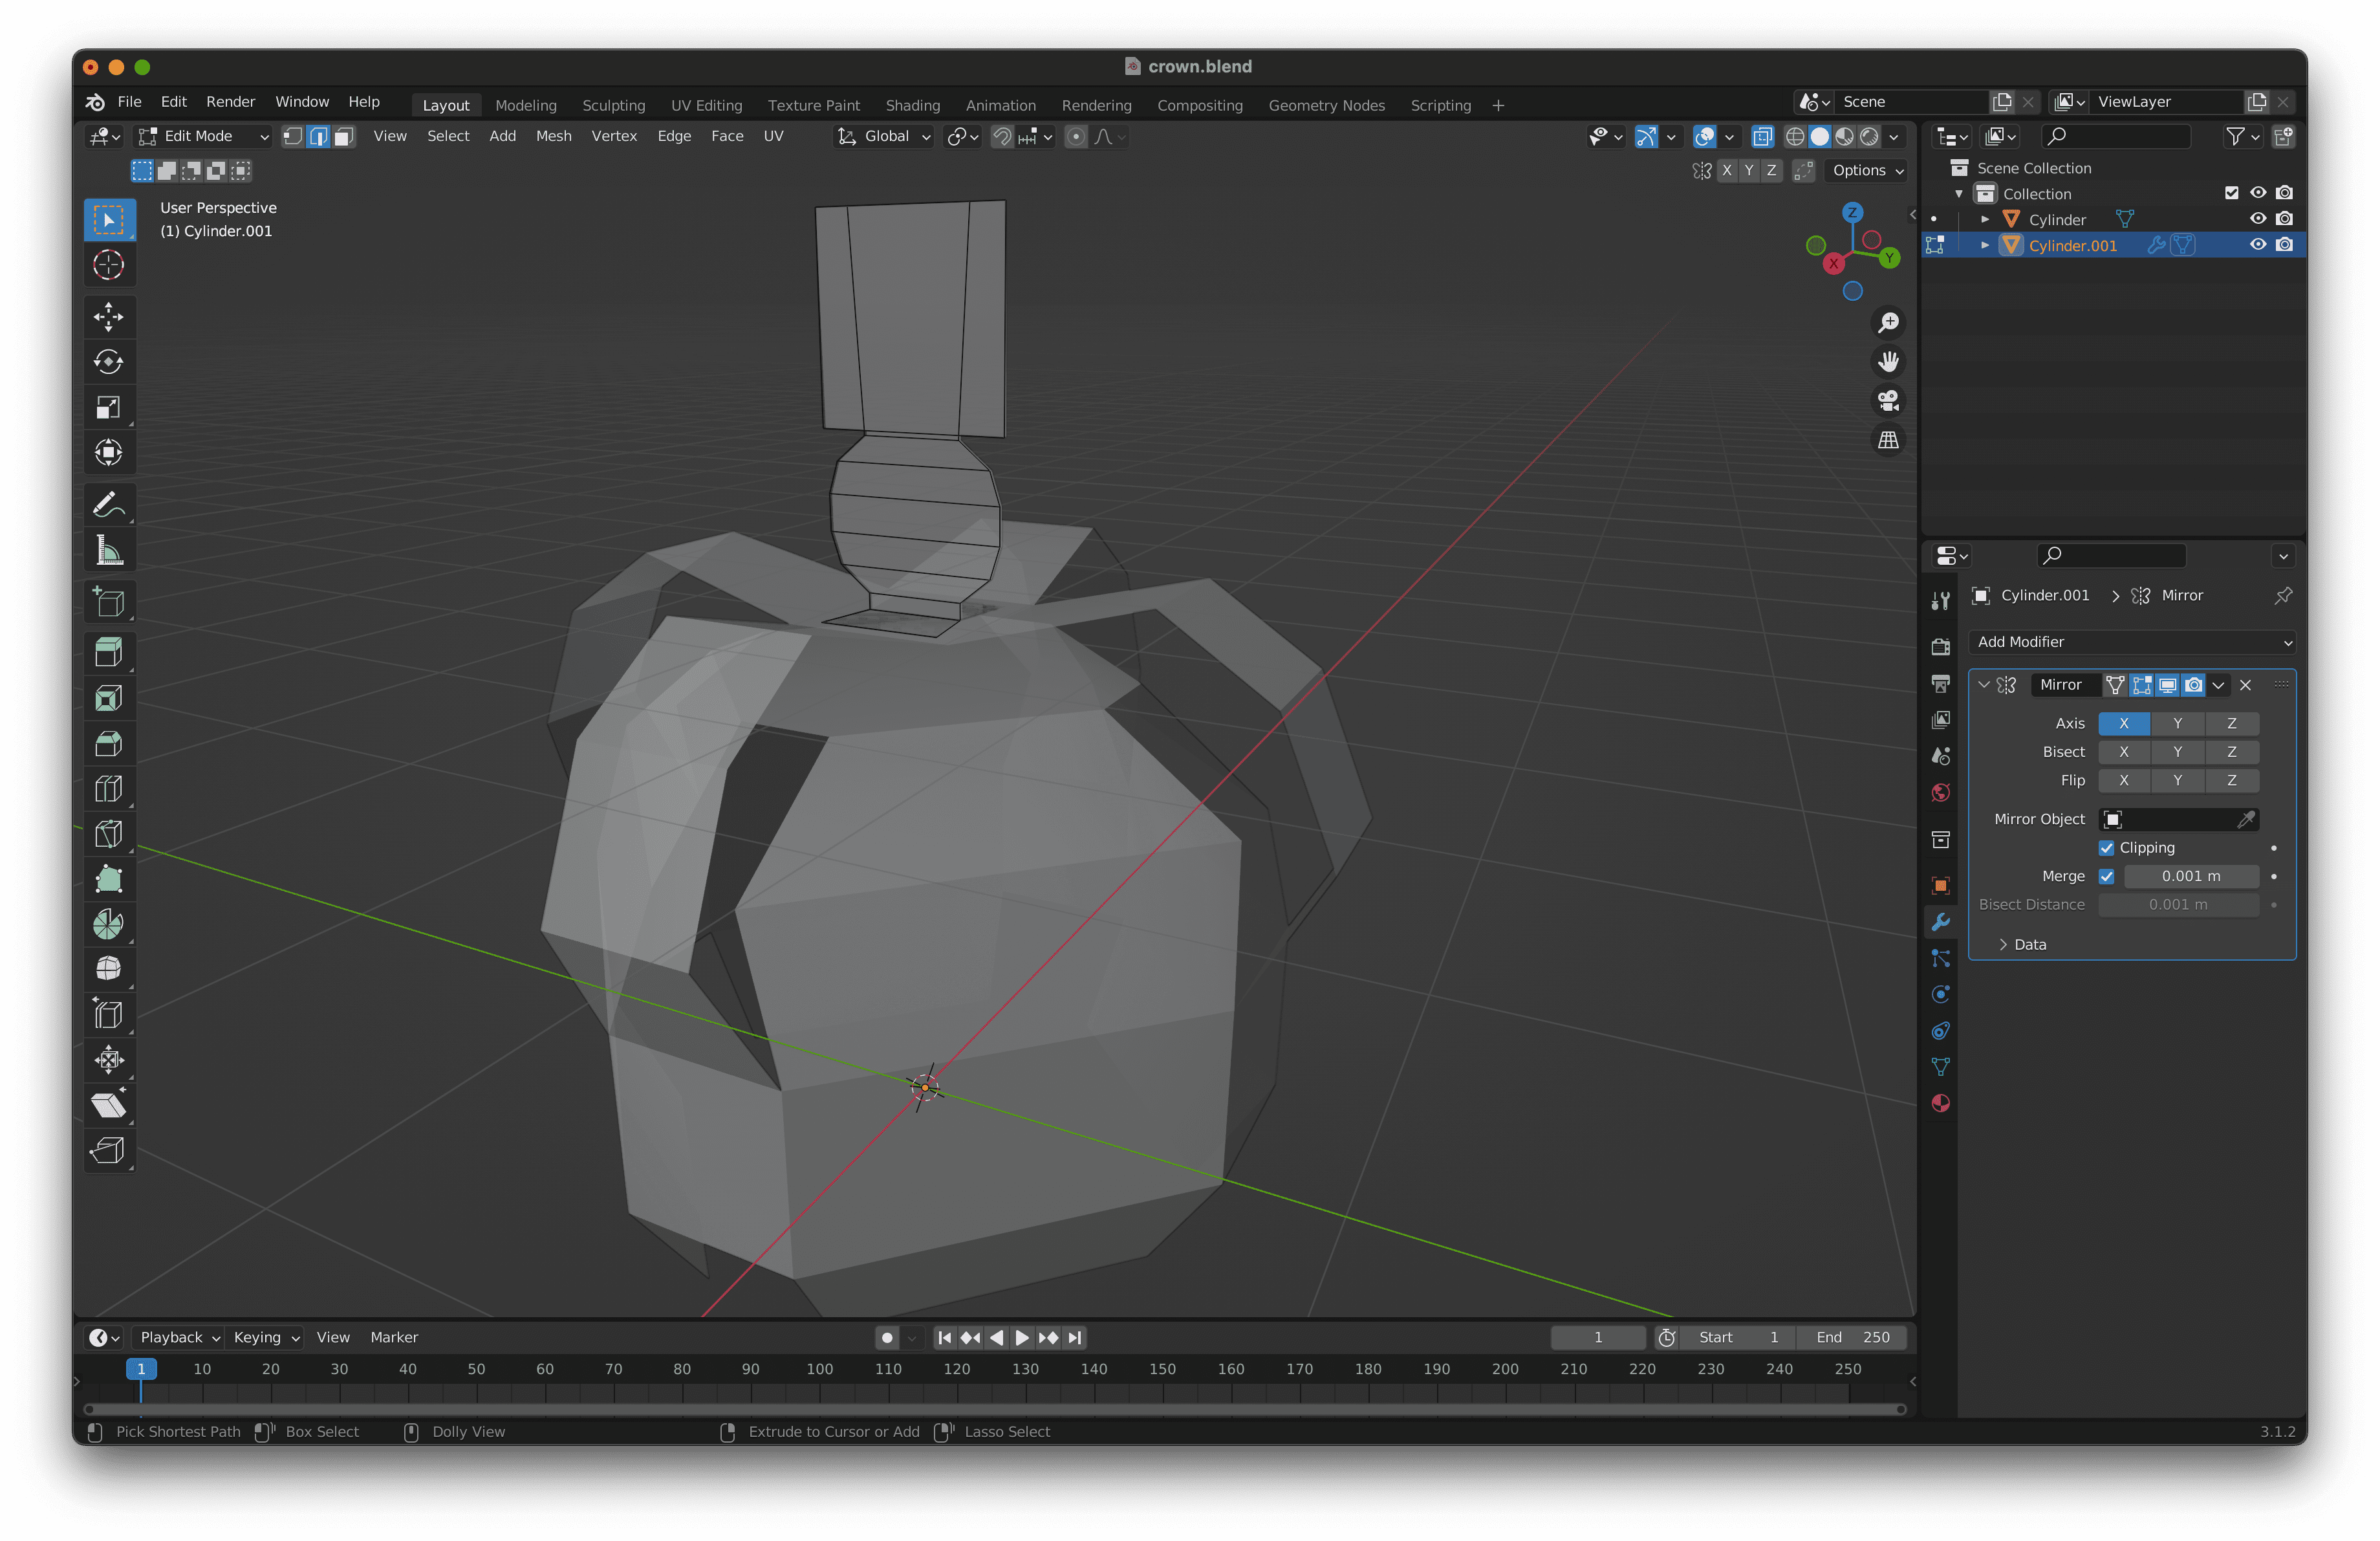
The Blender interface. You can see a few things here – there’s flaps at the bottom of the crown that I folded over for strength. The curved bits are actually segmented – I got rid of this in Unfolder, and the cross on the top is double thickness and has flaps for gluing on that I rounded in Sketch.
Toys
I’ve added a Toys page to my site. I have multiple ideas for future models, mostly featuring my own characters, but I have no idea if I will ever make them. I have so many things I want to do that this will have to fit in around my other projects.
That said, I’ve been tempted to see if any WordPress companies want their mascots/ logos made as paper toys – I figure it’d be great as a more ecological swag for conferences. I actually started making a Wapuu but didn’t like how boxy it was so wanted to start again. Maybe I’ll finish it one day!
How was it for you? Let me know on BlueSky or Mastodon
(Please) Link to this page
Thanks for reading. I'd really appreciate it if you'd link to this page if you mention it in your newsletter or on your blog.